In the field
Photos and annotation
Attaching photos to findings, drawing on them, what happens to image quality, and how photos travel when you have no signal.
By Owen Murray, founder of InspectorKit · Updated July 6, 2026
A photo without context is a puzzle at 9 pm. The whole point of photos in InspectorKit is that every image is attached to a specific finding on a specific item, so the report assembles itself with the evidence in the right place.
Attaching photos to an item
Open any item in the builder and tap the photo control. On a phone you get the camera directly, and on a laptop you get a file picker. The photo lands under that item, alongside its condition and narrative.
Because the photo belongs to the item, the published report shows it with the finding it documents. No sorting, no renaming files, no dragging images into a document at the kitchen table.
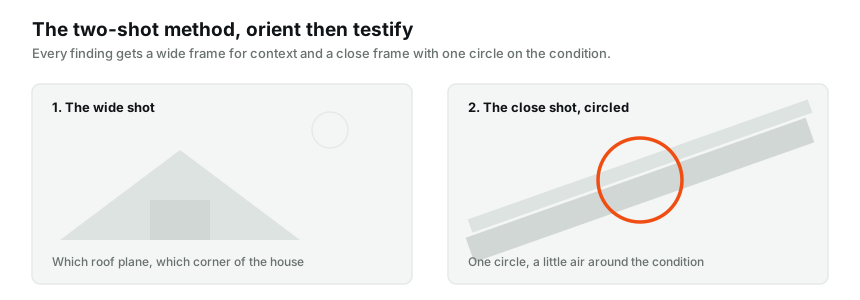
Shoot wide first, then close. One frame that shows where the problem lives in the room, one frame that shows the problem itself. The pairing answers the two questions every reader has, and it takes ten extra seconds.
Drawing on the photo
After a photo lands, tap Annotate. A drawing canvas opens and you mark the problem area directly, usually a circle around the defect. Save and the markup burns into the report view while the item shows a Marked badge so you know which photos carry annotations.
The circle does real work. Buyers are not trained to see what you see. A water stain that is obvious to you disappears into ceiling texture for everyone else until there is a ring around it.
Photos when the signal is gone
Photos taken in a dead zone save to your phone with the rest of your work and upload on their own once you are back in coverage. The sync pill in the header counts them among pending changes, which is normal in any basement. The full behavior is covered in the offline field guide.
One shot worth standardizing
Data plates deserve their own habit. Water heater, furnace, panel. Shoot the plate straight-on before you shoot the equipment, and the model and serial numbers stay readable in the report forever. Future you, writing an age estimate or checking a recall, will be glad the habit existed.
Where photos show up later
The published report places each photo under its finding with the annotation visible. Readers can tap to see the full image. The builder tour covers where photo controls sit among everything else on the item screen.
Common questions
How many photos can one item hold?
There is no per-item cap. Storage on your plan is generous enough that photo count is never the thing you think about on a job. Shoot what the finding needs.
Are my photos compressed?
Yes, on your phone before upload. Compression is tuned so text on data plates stays readable while files upload fast on weak connections. Originals stay in your camera roll if you shoot there first.
Can I remove or redraw an annotation?
Open the photo and tap Annotate again. You can redraw the markup at any point before or after publishing, then republish to update the report.